
 vite踩坑之旅
本文收集 vite2 踩坑记录。
# require is not defined
# 现象
const hat1 = require('./assets/hat1.png')
项目中使用 require 引入图片时,报标题错误。
在普通浏览器中,require 是未定义的对象,而 webpack 可以识别 require,这是两套构建模式。
# 解决
参考文档静态资源处理 (opens new window),采用 import 方式引入。
import hat1 from './assets/hat1.png'
或者使用new URL(url, import.meta.url)方式。
const hat1 = new URL('./assets/hat1.png', import.meta.url).href
# vite 配置 scss
以前是 vue-cli 的时候,使用 scss 的方式是
npm i sass-loader node-sass -D
如果是 webpack5 以下,还要注意版本降级。
使用 vite 后,直接安装 sass 即可使用,无需配置。
npm i sass -D
顺便配置下全局 scss。官方文档-preprocessoroptions (opens new window)。
新建文件,写入样式。
$active-color: red;
然后配置。
// vite.config.ts
	css: {
        //css预处理
        preprocessorOptions: {
            scss: {
                /*
                引入var.scss全局预定义变量,
                如果引入多个文件,
                可以使用
                '@import "@/assets/css/globalVariable1.scss";@import "@/assets/css/globalVariable2.scss";'
                这种格式
                */
                additionalData: '@import "@/assets/css/globalVariable.scss";'
            }
        }
    },
2
3
4
5
6
7
8
9
10
11
12
13
14
15
16
然后在任何 vue 文件中使用
<style lang="scss">
.test {
  color: $active-color;
}
</style>
2
3
4
5
less 同理。
# 移动端适配
使用amfe-flexible (opens new window)设置根字体,使用postcss-pxtorem (opens new window)将 px 转 rem。
npm i amfe-flexible -S
npm i postcss-pxtorem -D
2
// main.ts
import 'amfe-flexible'
2
// vite.config.ts
    css: {
        postcss: {
            plugins: [
                pxtorem({
                    rootValue: 75, // 换算的基数(设计图750,即2倍图)
                    propList: ['*'], //可以从px更改为rem的属性。
                    minPixelValue: 2 // 设置要替换的最小像素值。
                })
            ]
        },
        // https://cn.vitejs.dev/config/#css-preprocessoroptions
        preprocessorOptions: {
            less: {
                // 全局less变量
                additionalData: `@import "@/assets/css/globalVariable.less";`
            }
        }
    },
2
3
4
5
6
7
8
9
10
11
12
13
14
15
16
17
18
19
# 配置别名
可以使用 path 模块。
import path from 'path'
export default defineConfig({
  resolve: {
    alias: {
      '@': path.resolve(__dirname, 'src'),
    },
  },
})
2
3
4
5
6
7
8
也可以直接使用绝对路径。
export default defineConfig({
  resolve: {
    alias: {
      '@': '/src',
    },
  },
})
2
3
4
5
6
7
# vite 添加环境变量 import.meta.env
之前使用 webpack 构建项目,常常使用 process 变量,比如process.env.BASE_URL,那么在 vite 中可以使用吗?
通常情况下不能,因为浏览器不认。不过可以在vite.config.js进行配置。
export default defineConfig({
    define: { // 定义process
        'process.env': {
            BASE_URL: '/vite'
        }
    },
}
2
3
4
5
6
7
然后在需要的地方使用。不过对于 vite,官方使用环境变量的正确的方式是使用import.meta.env,见文档 (opens new window)
所以,在 history 模式下,可以如下设置 baseURL。
// vite.config.ts
export default defineConfig({
    base: '/vite',
}
2
3
4
然后在router/index.ts中使用:
import { createRouter, createWebHistory } from 'vue-router'
const home = () => import('@/views/home/index.vue')
const router = createRouter({
    // history: createWebHistory(process.env.BASE_URL), // 该模式只能在dev跑,生产环境跑不通,抛弃
    history: createWebHistory(import.meta.env.BASE_URL),
    routes: [
        {
            path: '/',
            component: home
        },
        {
            path: '/home',
            component: home
        },
    ]
}
2
3
4
5
6
7
8
9
10
11
12
13
14
15
16
与之相关的一个配置是.env文件 (opens new window)。比如在根目录下新建.env.test,写入
VITE_APP_TITLE=My App
配置 mode
// package.json
{
  "dev": "vite --mode test"
}
2
3
4
然后在业务代码中使用
console.log(import.meta.env.VITE_APP_TITLE)
注意要设置 ts 类型
// env.d.ts
interface ImportMetaEnv {
  readonly VITE_APP_TITLE: string
}
interface ImportMeta {
  readonly env: ImportMetaEnv
}
2
3
4
5
6
7
# 配置代理
vite 配置代理和之前的方式大同小异,见官网文档 (opens new window)。
export default defineConfig({
  server: {
    proxy: {
      // 字符串简写写法
      '/foo': 'http://localhost:4567',
      // 选项写法
      '/api': {
        target: 'http://jsonplaceholder.typicode.com',
        changeOrigin: true,
        rewrite: (path) => path.replace(/^\/api/, ''),
      },
      // 正则表达式写法
      '^/fallback/.*': {
        target: 'http://jsonplaceholder.typicode.com',
        changeOrigin: true,
        rewrite: (path) => path.replace(/^\/fallback/, ''),
      },
      // 使用 proxy 实例
      '/api': {
        target: 'http://jsonplaceholder.typicode.com',
        changeOrigin: true,
        configure: (proxy, options) => {
          // proxy 是 'http-proxy' 的实例
        },
      },
    },
  },
})
2
3
4
5
6
7
8
9
10
11
12
13
14
15
16
17
18
19
20
21
22
23
24
25
26
27
28
这里本地配置时,报了一个错误。
[vite] Hostname/IP does not match certificate's altnames: Host: localhost. is not in the cert's altnames: DNS:awen.sit.rvet.cn
添加跨域属性即可。
changeOrigin: true,
# 配置 eslint
在尝鲜 uniapp 使用 vite+vue3 时,发现项目没有配置 eslint。于是参考官网 (opens new window)安装 eslint
npm install --save-dev eslint eslint-plugin-vue
然后配置.eslintrc.js。
module.exports = {
  env: {
    browser: true,
    es6: true,
  },
  extends: ['eslint:recommended', 'plugin:vue/vue3-essential'],
  globals: {
    Atomics: 'readonly',
    SharedArrayBuffer: 'readonly',
    uni: true,
    wx: true,
    require: true,
    process: true,
    getApp: true,
    getCurrentPages: true,
    gioGlobal: true,
    Component: true,
    requirePlugin: true,
    exports: true,
    define: true,
    global: true,
  },
  parserOptions: {
    ecmaVersion: 2020,
    sourceType: 'module',
  },
  plugins: ['vue'],
  rules: {
    'linebreak-style': ['off', 'windows'],
    // 单引号
    quotes: ['error', 'single'],
    // js部分不要分号
    semi: [0, 'always'],
    'no-undef': 'off',
    // Vue 风格
    // 指令缩写
    'vue/v-bind-style': ['error', 'shorthand'],
    'vue/v-on-style': ['error', 'shorthand'],
    // 组件/实例的选项的顺序
    'vue/order-in-components': [
      'error',
      {
        order: [
          'el',
          'name',
          'parent',
          'functional',
          ['delimiters', 'comments'],
          ['components', 'directives', 'filters'],
          'extends',
          'mixins',
          'inheritAttrs',
          'model',
          ['props', 'propsData'],
          'data',
          'computed',
          'watch',
          'LIFECYCLE_HOOKS',
          'onLoad',
          'onReady',
          'onShow',
          'onHide',
          'onUnload',
          'methods',
          ['template', 'render'],
          'renderError',
        ],
      },
    ],
    // 元素/组件特性,属性的顺序
    'vue/attributes-order': [
      'error',
      {
        order: [
          'DEFINITION', // e.g. 'is', 'v-is'
          'LIST_RENDERING', // e.g. 'v-for item in items'
          'CONDITIONALS', // e.g. 'v-if', 'v-else-if', 'v-else', 'v-show', 'v-cloak'
          'RENDER_MODIFIERS', // e.g. 'v-once', 'v-pre'
          'GLOBAL', // e.g. 'id'
          'UNIQUE', // e.g. 'ref', 'key'
          'SLOT', // e.g. 'v-slot', 'slot'.
          'TWO_WAY_BINDING', // e.g. 'v-model'
          'OTHER_DIRECTIVES', // e.g. 'v-custom-directive'
          'OTHER_ATTR', // e.g. 'custom-prop="foo"', 'v-bind:prop="foo"', ':prop="foo"'
          'EVENTS', // e.g. '@click="functionCall"', 'v-on="event"'
          'CONTENT', // e.g. 'v-text', 'v-html'
        ],
      },
    ],
  },
  overrides: [
    {
      files: ['*.vue'],
      rules: {
        indent: 'off',
      },
    },
  ],
}
2
3
4
5
6
7
8
9
10
11
12
13
14
15
16
17
18
19
20
21
22
23
24
25
26
27
28
29
30
31
32
33
34
35
36
37
38
39
40
41
42
43
44
45
46
47
48
49
50
51
52
53
54
55
56
57
58
59
60
61
62
63
64
65
66
67
68
69
70
71
72
73
74
75
76
77
78
79
80
81
82
83
84
85
86
87
88
89
90
91
92
93
94
95
96
97
98
99
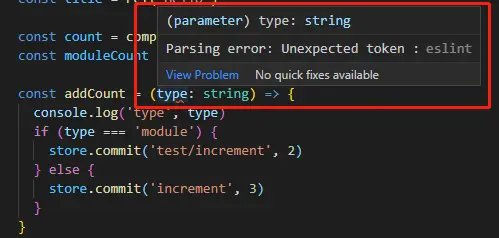
# Parsing error: Unexpected token :
这个报错是 eslint 无法识别 ts 语法,截图如下
于是下载对应的 parser:@typescript-eslint/parser。
npm i @typescript-eslint/parser -D
然后在.eslintrc.js配置
module.exports = {
  parser: '@typescript-eslint/parser',
}
2
3
还有报错Parsing error: '>' expected.
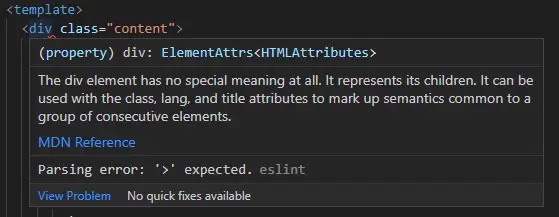
vue 模板是vue-eslint-parser来识别和 lint 的,这种配置会将其覆盖(参考 (opens new window)),改写下
- "parser": "@typescript-eslint/parser",
+ "parser": "vue-eslint-parser",
  "parserOptions": {
+     "parser": "@typescript-eslint/parser",
      "sourceType": "module"
  }
2
3
4
5
6
# 生产环境移除 console
vite 内置了terser 压缩 (opens new window),可以配置
// vite.config.ts
  build: {
    minify: 'terser',
    terserOptions: {
      compress: {
        //生产环境时移除console
        drop_console: true
      }
    }
  },
2
3
4
5
6
7
8
9
10
也可以使用 esbuild 去除,注意此方式在 uniapp 开发微信小程序时也会去除 console。
esbuild: { pure: ['console.log'], minify: true },
# cdn 引入第三方库
从jsdelivr (opens new window)下载第三方库,比如 vue,这样就不用每次打包了。方式如下:
下载的资源比如
vue.global.js和vue.global.min.js存放到public/static/npm/vue@3.2.25目录。安装 vite 插件,其中
vite-plugin-externals用于设置别名,vite-plugin-html-config用于向index.html插入 html 标签。npm i vite-plugin-externals vite-plugin-html-config -D1// vite.config.ts import htmlPlugin from 'vite-plugin-html-config' import { viteExternalsPlugin } from 'vite-plugin-externals' export default defineConfig(({ mode }) => { // const env=loadEnv(mode, process.cwd()); // 获取.env文件里定义的环境变量 const isProd = mode === 'build' return { plugins: [ vue(), htmlPlugin({ links: [ { rel: 'stylesheet', href: '/static/npm/vant@3.4.1/lib/index.css', }, ], scripts: [ { src: isProd ? '/static/npm/vue@3.2.25/vue.global.min.js' : '/static/npm/vue@3.2.25/vue.global.js', }, { src: '/static/npm/vant@3.4.1/lib/vant.min.js', }, ], }), viteExternalsPlugin({ vue: 'Vue', vant: 'vant', }), ], } })1
2
3
4
5
6
7
8
9
10
11
12
13
14
15
16
17
18
19
20
21
22
23
24
25
26
27
28
29
30
31
32
33